Setting up multi-factor authentication (MFA)
How to set up MFA for quick and secure access to your Goldsmiths IT account.
Primary page content
To access Goldsmiths services, you are required to set up two methods of authentication. This provides a backup in case your primary method becomes unavailable.
We recommend using the Microsoft Authenticator app on your iOS or Android device as your primary authentication method, as it is the fastest and most convenient option.
Follow the steps below to set up the app, and make sure to add a second authentication method as your backup.
If you don’t have an iOS or Android phone, alternative authentication methods are also available.
See other methods if you don't have an iOS or Android phone.
You will need:
- Your phone
- Ideally, a laptop or other device with a web browser*
- Around 10 minutes
* If you only have a phone, follow the additional 'cannot scan the QR code' instructions below.
Step 1 - Install the Microsoft Authenticator app
On your phone install the Microsoft Authenticator app.
Find this in your app store or go to aka.ms/authapp.
Get help if you are using an Android phone in China.
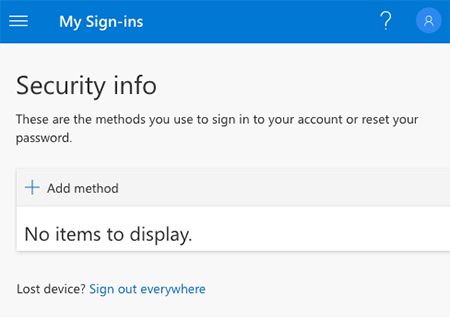
Step 2 - Go to your Security info
Ideally, do this on your laptop or a different device to your phone.
Go to mysignins.microsoft.com/security-info (opens in a new window).
If you are already signed in this will take you to a page that looks like this:
Enter your Goldsmiths username in the format abcde001@campus.goldsmiths.ac.uk.
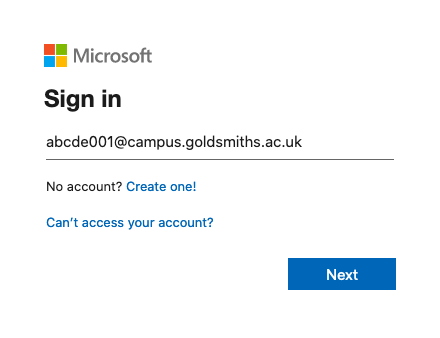
Click next and enter your password.
Step 3 - Add Authenticator app method
Click '+ Add method'
Select 'Authenticator app' from the drop-down.
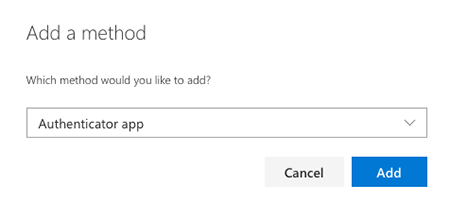
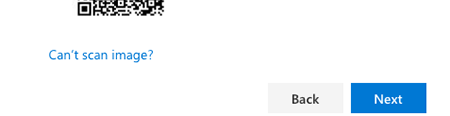
Click 'Add' and then keep clicking 'Next' until you see a QR code:
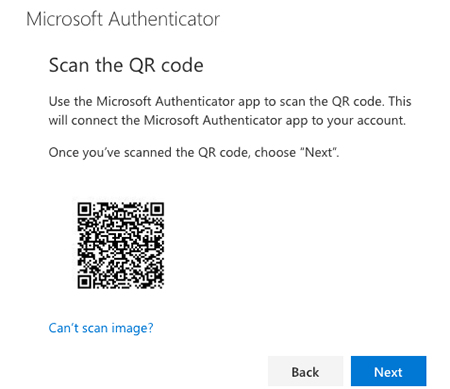
Step 4 - Set up the Microsoft Authenticator app
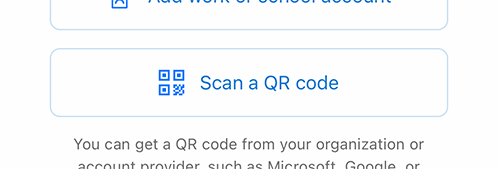
On your phone, open the Microsoft Authenticator app. Check and agree to the privacy statement.
Then click 'Scan a QR code'.
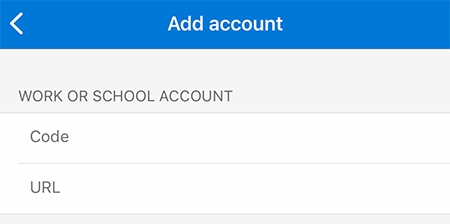
If you cannot see this, add a work or school account and then select to scan a QR code.
Give the app access to your camera and scan the QR code on your laptop screen.
If your phone is unable to recognise the QR code on your laptop screen it might be easier to start this process again using the web browser on your phone.
On your web browser click on 'Can't scan image?' under the QR code.
You will be given a code and URL to copy into the app. If you are looking at this on your phone you can click the code and URL to copy them.
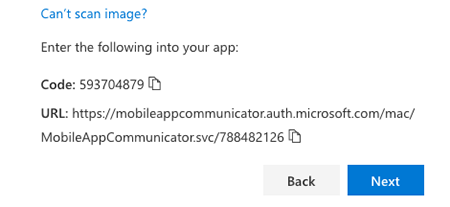
In the app click on 'Or enter code manually'.

Then enter the code and URL on the next screen.
You will then be able to continue the setup.
Step 5 - Notifications - iOS only
If you have an iPhone, you will then be asked about notifications. The app can send a notification when you sign in asking you to approve it. This is the quickest way to sign in to your account. Therefore we recommend clicking 'allow' for notifications.
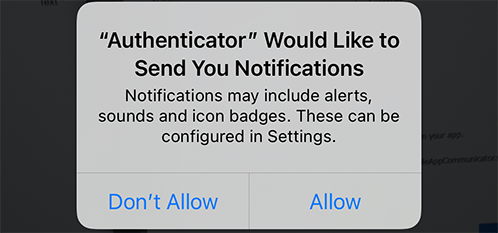
You can also control your notifications in your phone settings.
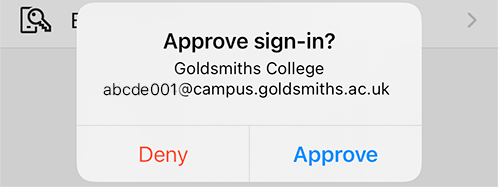
Step 6 - Approve your app
Go back to your web browser and click 'Next'
Your phone will then get a notification asking you to approve sign-in. Click 'Approve'.
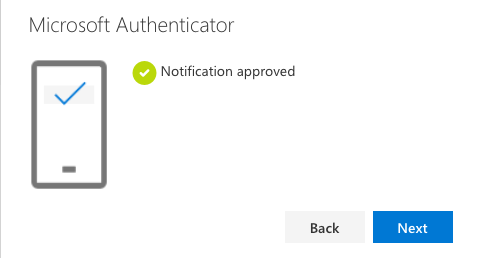
Your web browser will now show this message. Click 'Next'
Step 7 - Add an additional method
We recommend you add an additional method to approve sign-ins in case you lose or cannot access your phone.
(Note the Microsoft Authenticator app will work without a mobile or Wi-Fi connection.)
You can install the Microsoft Authenticator app on another iOS or Android device.
You can also use a different authenticator app if you would prefer.
Go to mysignins.microsoft.com/security-info (opens in a new window).
Click '+ Add method'.
Then select 'Authenticator app' and follow the instructions.
Go to mysignins.microsoft.com/security-info (opens in a new window).
Click '+ Add method'.
Select 'Phone' from the drop-down and click 'Add'.
Select your country and enter your phone number.
Select 'Text me a code' and click 'Next'.
You will receive a 6-digit code by text. Enter this and press next.
You will now receive codes by text when you sign in.
You will not be charged for receiving text messages
You can receive calls to a mobile or landline phone. This can be your Goldsmiths phone number.
Go to mysignins.microsoft.com/security-info (opens in a new window).
Click '+ Add method'.
Select 'Phone', 'Alternative phone' or 'Office phone' from the drop-down and click 'Add'.
Select your country and enter your phone number.
Select 'Call me' if required and click 'Next'.
You will then receive an automated call. Press # on your phone to approve. This is how you will approve sign ins going forward.
You will not be charged for receiving phone calls.
Changing your default method
You can set which method Microsoft sign-in will try first.
Go to mysignins.microsoft.com/security-info (opens in a new window).
Above '+ Add method', there is a link you can click to set or change your default method. This will bring up a drop-down you can select from.